


Day 5- A picture of your favorite memory:
 [Site of the Boston Massacre; October 2009]
I'm a history nerd. Big time. Pre-Revolutionary American history is a fascination of mine. My mom and I take a mother-daughter trip every year. In 2009, we drove (ughhhhh) up to New England for the weekend. We drove, because we wanted to stop in NYC and I wanted to stop in Philadelphia and see the Liberty Bell and Constitution Hall. We went to Salem (the Salem Witch Trials have always intrigued me), took a ferry over to Martha's Vineyard, went to Lexington and Concord to see the war stuff and the Louisa May Alcott house and then we spent a day in Boston. Being in an area that is home to SO much history was just so special to me. Standing in the spot where the massacre happened had me speechless. Then you look across the street and there was the spot where the Declaration of Independence was read for the first time. It was an amazing trip and I will never, EVER forget it.
Today I got crafty =) I really wanted this to go over our bed, but at $350, it's way out of budget. I still wanted some kind of "art" for over the bed, and I wanted it to be personal. I got inspired by pics of John & Sherry's old bedroom over at Young House Love. They had individually framed letters over the bed. I wanted something similar, but I wanted it in one big frame as opposed to two little ones. This is what I came up with:


*
Today I got crafty =) I really wanted this to go over our bed, but at $350, it's way out of budget. I still wanted some kind of "art" for over the bed, and I wanted it to be personal. I got inspired by pics of John & Sherry's old bedroom over at Young House Love. They had individually framed letters over the bed. I wanted something similar, but I wanted it in one big frame as opposed to two little ones. This is what I came up with:


I haven't hung it yet, but you get the idea of how it will look over the bed.
They were so easy to make. And cheap! Just some coordinating scrapbook paper, and a ridiculously discounted frame from Michael's. This project cost me less than $16.00 and was so easy to make. I went into Microsoft Word, and printed out very large letters. I used the Word Art feature and just stretched it to fill the whole page. I cut it out, traced it onto scrapbook paper and cut it out again. I then took two large sheets of coordinating paper, trimmed and taped it to fit onto the cardboard backer, and then lined my letters up on the backing. This was easy and I am really happy with how it looks!
And don't laugh, but I also made coasters. Graham has worked SO hard on the nightstands, and when they are eventually done, I think he'd kill me if water stains ended up screwing up the color he's seriously stressing himself out over. These are simple, but they'll get the job done and keep my nightly glass of water from making a mess.
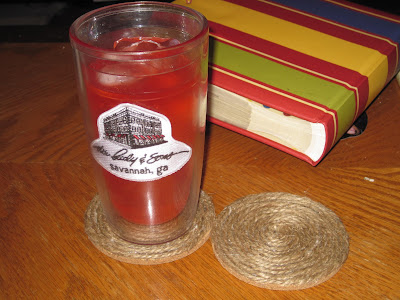 [Cork & hemp coasters; tutorial courtesy of Make it & Love it]
Love the initials art piece! Do you mind sharing what font you used? I like the look of it!!
ReplyDeleteThanks so much! The font I used is called "Harrington".
ReplyDeleteHow adorable ~ I love the fun papers you chose, and how they coordinate with the pillows! The coasters turned out really cute, too! ;)
ReplyDeleteThis is beautiful. I think I may make a similar one for my mother-in-law and future step father-in-law when they wed.
ReplyDelete